What is Sedlauncher.exe?
The Sedlauncher.exe file is pushed to the system along with the Windows Update KB4023057 and its purpose is to optimize the speed of the Windows Update Service components in the operating system. However, many users have reported that the process associated with the file causes high disk utilization instead.
Is Sedlauncher.exe a virus?
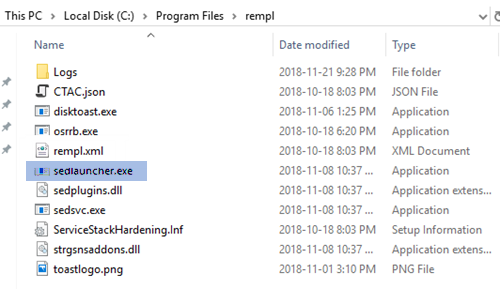
The original file for Sedlauncher.exe is not a virus; it is a Windows system file. But cybercriminals usually name viruses such that their names resemble that of genuine programs or processes to avoid detection. The original location of the file is in the following folder: C:\Program Files\rempl To check whether or not the process causing high disk utilization in Windows 10 is a virus, right-click on it and select Open file location. If the file location is the same as the one for the Sedlauncher.exe file, well and good. Else, run a full anti-virus scan on your system.
Should you remove Sedlauncher.exe or kill the process in Task Manager?
While the Sedlauncher.exe file is helpful for Windows Updates, if the process associated with the file causes high disk utilization and slows down your computer, try updating Windows to the latest version just in case Microsoft has pushed a fix. You can either disable Sedlauncher.exe from the Task Manager or the Service Manager window. The procedures are as follows:
1] Using Task Manager
You can kill the process associated with the Sedlauncher.exe file using the Task Manager. Press CTRL+ALT+DEL to open the Security Options window. Select Task Manager to open the Task Manager window. Right-click on the Windows Remediation Service task and select End Task.
This will kill the process for the while, however, the problem may reappear later after you restart the system. Read: What is the Device Census (devicecensus.exe) file?
2] Using the Service Manager
If the Windows Remediation Service is to be disabled permanently, this has to be done through the Service Manager. The procedure to do so is as follows: However, you should note that without Windows Setup Remediation, your updates may not go smoothly – and so we do not recommend your completely disabling this service permanently. Press Win+R to open the Run window and type the command services.msc. Hit Enter to open the Service Manager window. Scroll to Windows Remediation Service, right-click on it and select Properties.
Change Startup type to Disabled.
Hit Apply and then OK. Save the settings and restart your system. The problem must be resolved. Disabling I hope it helps! Read next: What is Windows Update Medic Service (WaaSMedicSVC)?